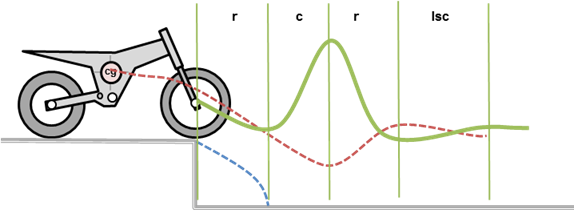
We use 'response calculations' to analyze chassis and wheel movement. This gives us a way to quantify how the bike should react to different bump impacts and track obstacles.
Response calculations and visualizations have to start somewhere.
We don't want to start with the suspension fully extended, so we start with the bike at race sag.
All bump impacts start and end here (at race sag).
In these examples the bike drops off a loading dock, simulating flat landing.
The compression stroke is simply compression force, or the compression damping curve.
The rebound stroke has an advantage as rebound force is linear and can be compared against an ideal standard.
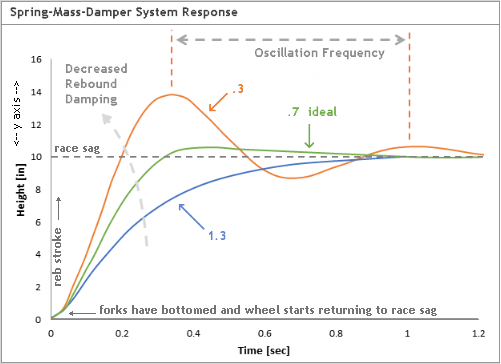
We have found that 'ideal' rebound will have a r-zeta value of .70.
This info was copied from zeta_rzeta_explained.php
Fork zeta chart
Rebound damping controls the return of the wheel after bump impact.
The oscillation response can be calculated by two fundamental parameters, tau and zeta. Those two parameters are simple functions of mass, spring rate and damping.
Calculating mass of the bike, spring rate, leverage ratio and rebound damping gives you a value for 'zeta'.
This 'zeta' number is used to analyze and compare rebound response.
The chart shows three zeta values for typical fork rebound.
The 10 inch height represents fork sag. This is where everything starts. The goal is for the front wheel to return to race sag without packing or overshooting.
r-zeta = .3 is too fast and would baby buggy, the wheel overshoots race sag, when it settles back it undershoots and then overshoots again.
r-zeta = .7 is ideal, the wheel slightly overshoots race sag, which helps keep the front end up, then settles down without any baby buggy motion.
r-zeta = 1.3 is too stiff and packs, the wheel does not make it back to race sag starting position before hitting the next bump.
[see animations below]
r-zeta is very powerful and shows if the rebound is correct
r-zeta is the same for forks and shocks. The difference in the graph for shocks would be 8" ht with 4" race sag.
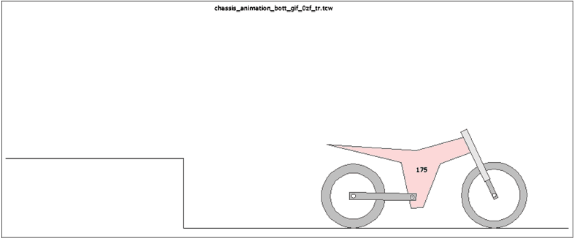
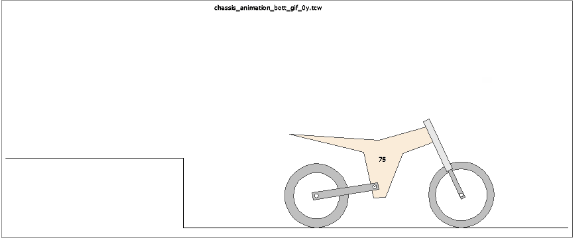
Chassis Response
This example has exaggerated r-zeta .30.
Bike drops off loading dock and bottoms.
rebounds to quickly and chassis overshoots race sag
because it overshoots race sag, the chassis it too high in the stroke
because it's too high in the stroke, the chassis settles below race sag
process repeats and quick rebound causes chassis to overshoot race sag again, resulting in baby-buggy ride